

The Trash Can Kegerator
With the summer season approaching fast, that means beer festivals and backyard gatherings. And that means a way for me to serve them. Last year’s 55 gallon trashcan worked fine (and was highly functional if you are on a tight budget), but I was interested in stepping up the game a little more. Rather than going full jockey box, I thought I’d take a new stab at the trashcan idea. Why not just grow a pair and go jockey box? Here was my reasoning:
- I wanted something fully contained. Nothing hanging out, extra tubs of ice, extra hoses, etc. Aside from looking a little cleaner, if this was going to be left out at a party, I didn’t want to invite trouble. And it would look a little nicer.
- Cleaning and carbonation. Running beer through long coils takes a lot of pressure. It’s fine if you know you are going to go through all the beer in 4 hours, but what if it’s gotta go longer? Also, it’s just more stuff to clean.
- I had a lot of the parts to make a three keg system
- When the event is over, it takes about 15 seconds to get the thing on the truck and get out.
So, I set out to build a rolling trash can kegerator that didn’t look like… well… a rolling trash can. And here’s how I did it.
The first thing was to begin sourcing materials. I knew I wanted to use a black trash can, so I found a 65 gallon commercial one at Home Depot. While I’m not wild about the wheels, it did have a pretty solid metal axel which should make it strong enough to handle the weight of ice and beer.
I sourced the rest of the equipment from a few homebrew sites (Adventures in Homebrewing and Northern Brewer). You’ll want to at least get appropriate taps, shanks, tailpieces, tubing, and nuts in one shot. I managed to do this… sort of. Just be sure to really pay attention to the lengths of your shanks. I found that out the hard way. Ultimately, you’ll want each tap to have:
- Shank and collar
- Faucet
- Hex nut for the shank
- Tailpiece (I prefer MFL connections over barb)
- Tubing and clamps (or spin nuts depending on your setup)
I wanted three taps, but you could obviously go with fewer. I suppose you could go with more, but you’d need a bigger trashcan. Or smaller kegs? Or both? Anyway, with the majority of parts in hand, let’s get started. Safety goggles on.
1. Sizing It Up
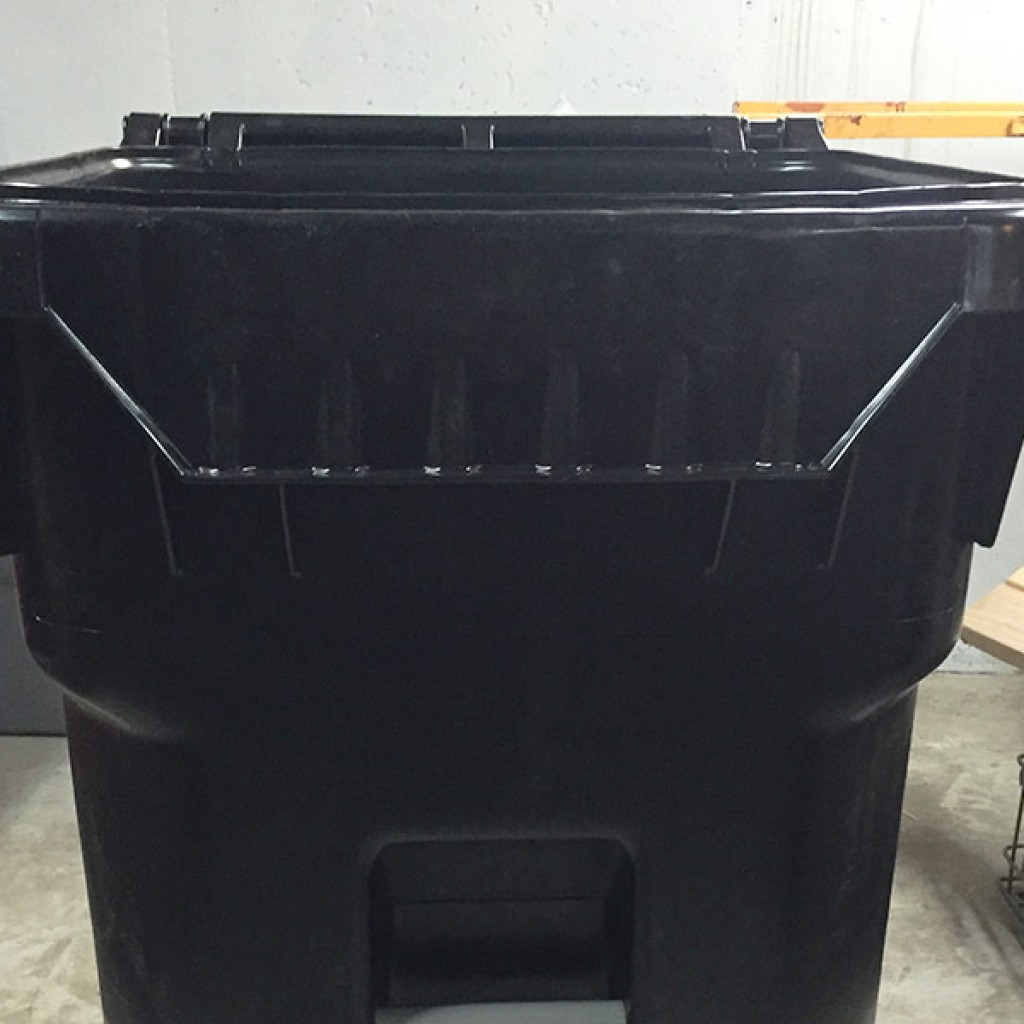
This is the front of the trash can. There are a lot of styles for these, so be sure you know what you are looking for. this one has one of those rigid and ribbed trapezoid “plates” on the front. They help make the can more structurally sound at the top, but add a bit of a design challenge. For my solution, I decided to use a wood plate to offset the angle and add a little more solid backing to attach the shanks.
2. Creating the Support Spacer
I cut a piece of 1×6 scrap I had laying around my workbench to fit the trapezoid shape. You’ll also notice from the first picture that there is a funny ridge pattern in that area that made the angle of the wood spacer too far off vertical for me. I marked the spacing and depth on the spacer and bored it out. You can do this with router or multiple shallow passes on a table saw. If you really enjoy it, you could file it by hand, but that means you probably like torturing yourself. Once the piece fit in flush, I clamped it to the trashcan and began to drill out the holes using a 1 inch hole saw. I should note, my spacing was set due to the gigantic and precut wall mount drip tray I’d be using. Space your holes accordingly. Just be sure to measure the collars you are using for your taps.
And yes, I stained and polyurethaned that scrap wood.
3. CO2 Mount
Once the holes were drilled, I moved to mounting the CO2 canister. Since I wanted this to be self contained, the tank needed to be inside. After some initial measuring (don’t forget the regulator), I mounted a small steel garage shelf organizer unit and a pair of D-rings to the corner of the can. Since this may be below a water line, I used stainless steel bolts and rubber gaskets to seal the holes and keep it rustproof. The D-rings anchor the 5lb canister using a bungie cord and the bottom of the tank is supported by the organizer. I also mounted some screws with wingnuts to the opposite side to attach the gas manifold. That should keep the tubing somewhat untangled. Just be sure to mount everything below the closing lid.
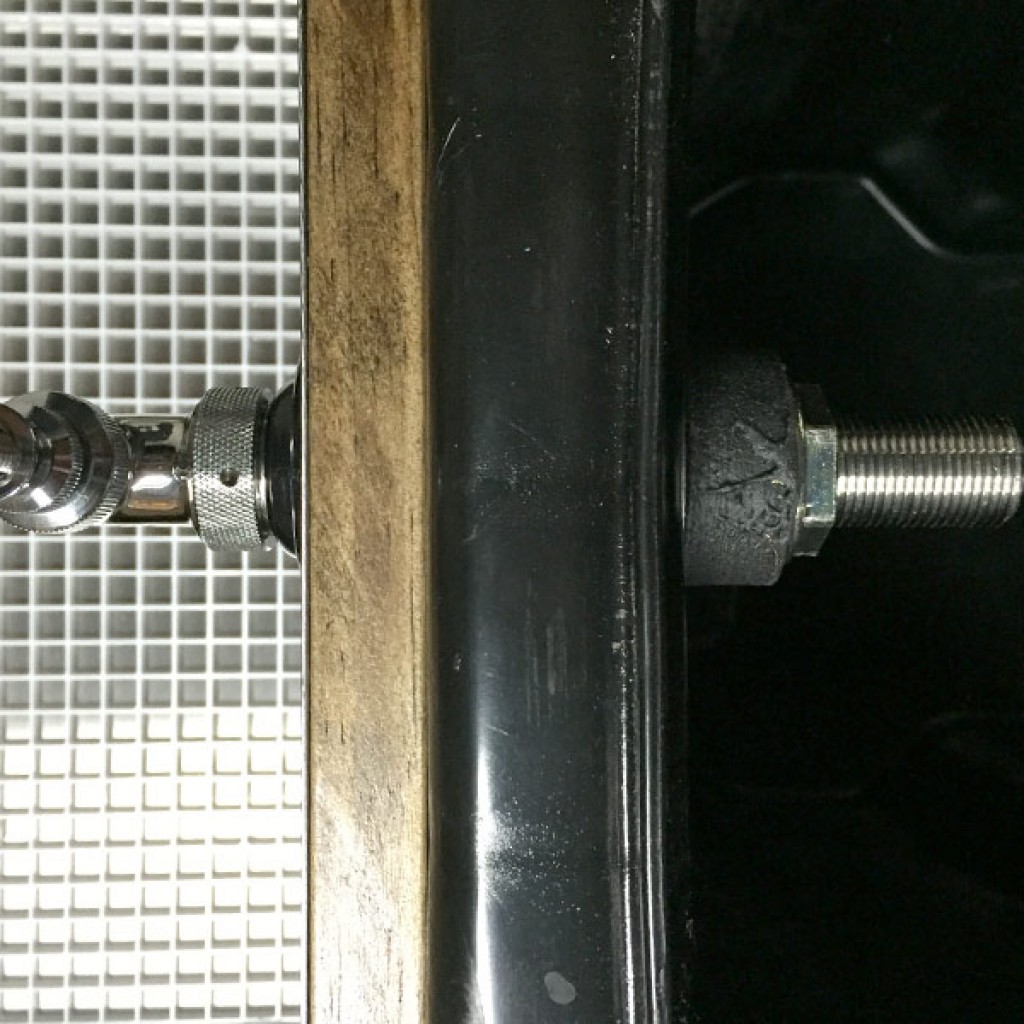
4. Installing the Shanks
It was time to attach the shanks. Unfortunately, I did not take into account a few things when I ordered my shanks. First, shank measurements are the whole thing, not just the part behind the collar. Second, I did not take into account how far the nut that attaches the tailpiece would go on the shank. And finally, I did not take into account the the trash can is curved enough that far from center that the shanks would not sit flat. So I had to return the 4 inch shanks and get 6 inch ones. Also, to combat the curve of the front of the trash can, I used a drill press to create angled shims of wood which I coated in rubberized paint. There’s a lot of ways to do it, but the right flat drill bit and a few shims to angle the wood worked for me. I installed the shanks using 1 inch washers on both sides of the shims.
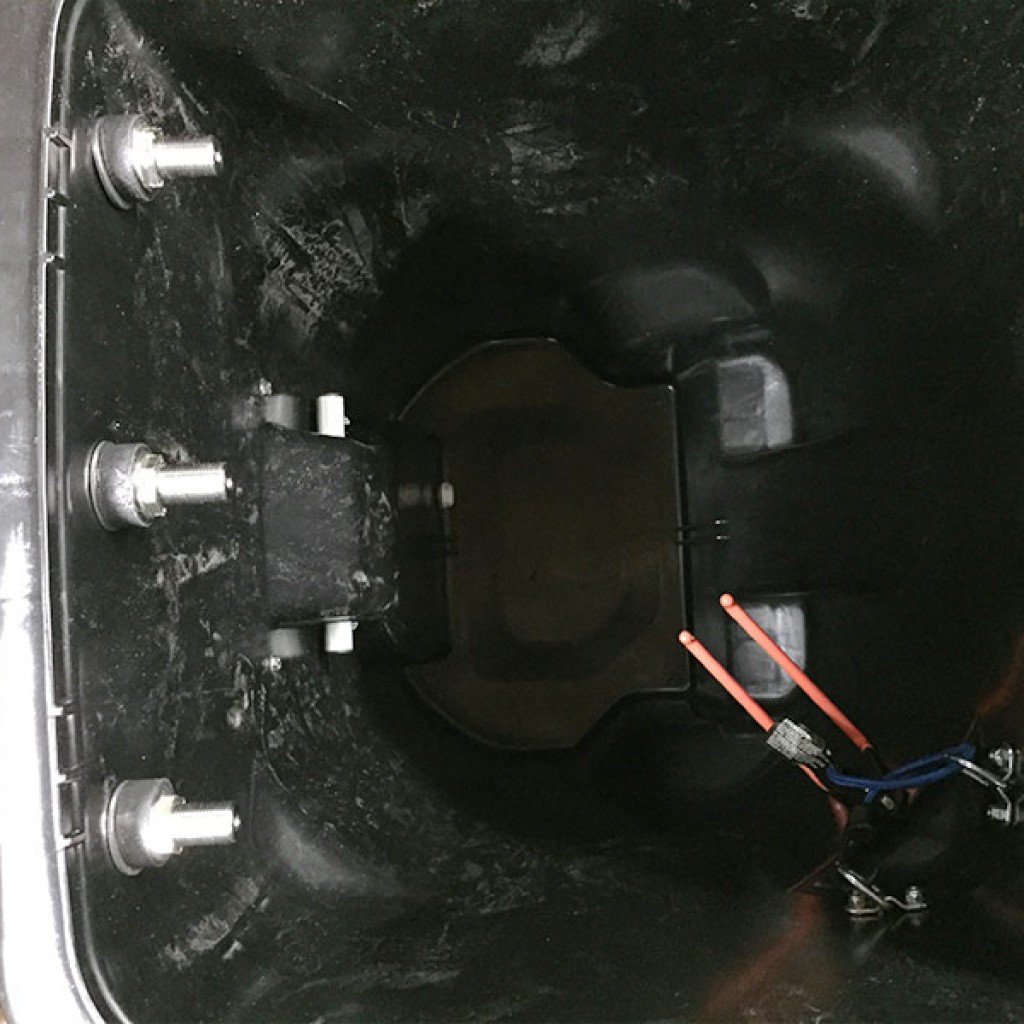
5. Drip Tray and Finishing Up
Here’s a shot of everything installed from the top down. I’ve also added a drain plug for a boat cooler at the bottom. The final item was the stainless drip tray.The tray is so deep and sets out pretty far from the can, so I added a piece of wood on the inside lip of the bottom of the tray. Again, this would definitely be below a water line, so I used stainless bolts, washers and rubber gaskets to secure it to the can. You don’t have to do this, but the drip tray made it feel less like a trash can. You could easily just do taps and save yourself the time and expense here. Finally, the drip tray has a drain so I had to find a threaded barb to pop a hose on to. Though you could skip the hose and just put a bucket there. Your call, I won’t judge.
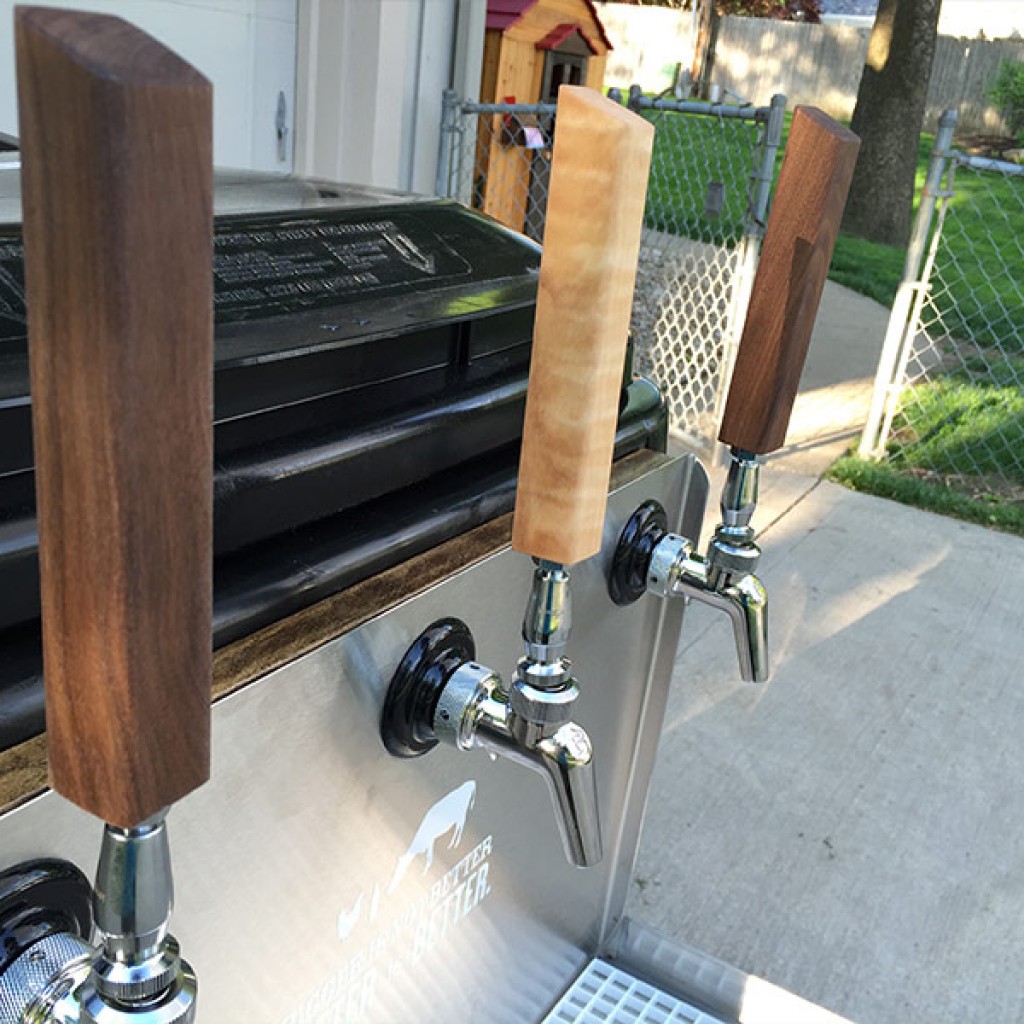
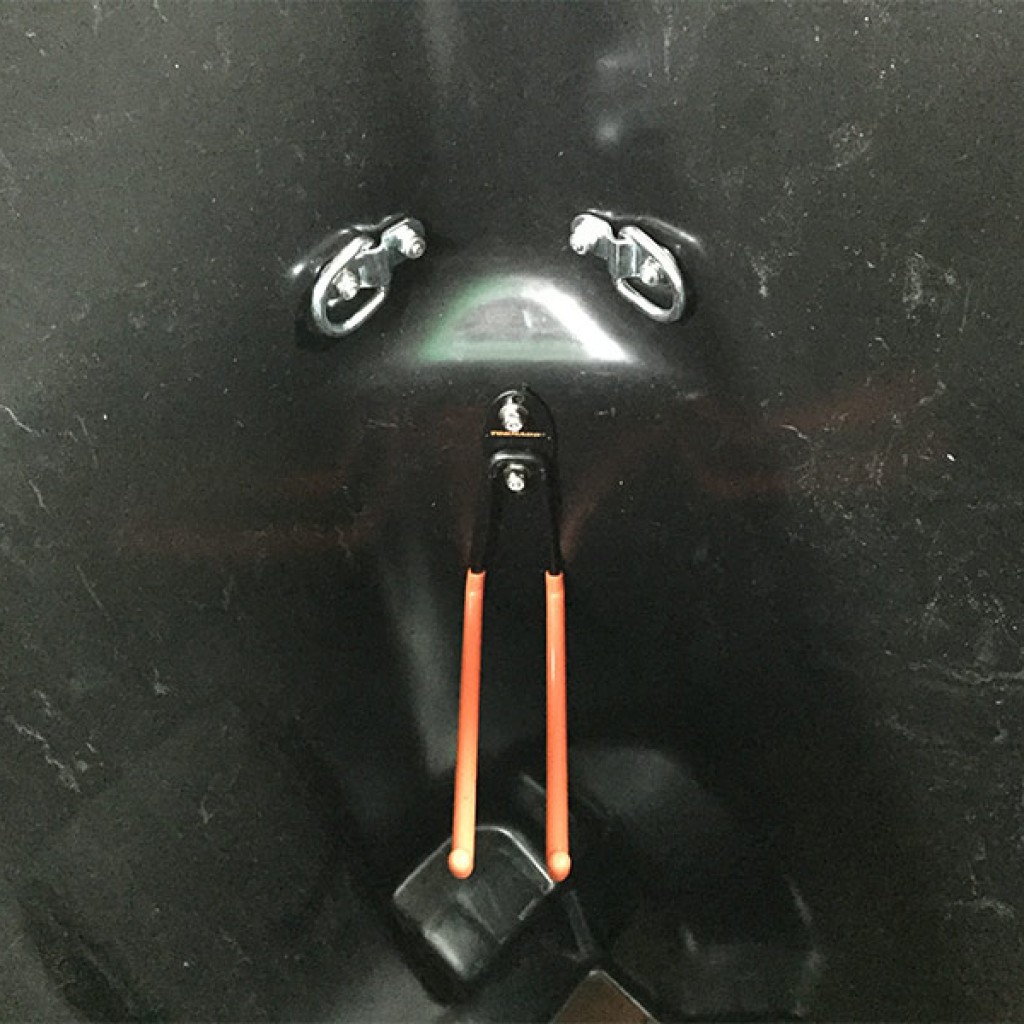
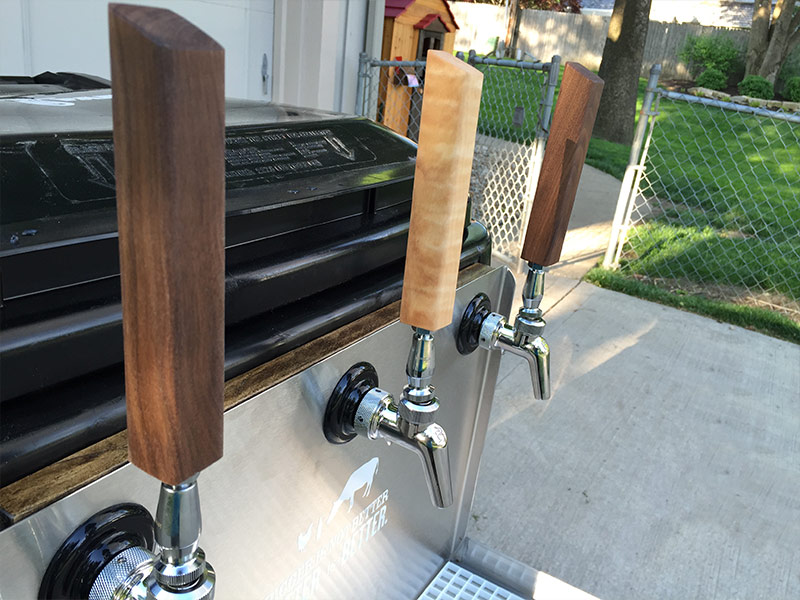
6. Design Details
With everything in place, I went to finishing up with some cosmetic improvements. First were some tap handles from BeardedBoy design. I am sucker for black walnut and maple and these seemed to fit perfectly in with the farm theme. I also had some custom vinyl made to brand the can with a little more fun Beer Farm sayings and logos.
7. Sourcing
So there you have it. This is a pretty nice step up from last year. I plan on building a blind for the whole unit for beer festivals, but the branding will remain for self-serve gatherings. Here are links to the places where I bought most of the stuff I used.
Home Depot (trash can)
Adventures In Homebrewing (Shanks, taps, tail pieces, drip tray, etc)
Northern Brewer (Shanks, tubing, manifolds and connectors)
BeardedBoy Design (Tap handles)
Westlake Ace Hardware (Stainless hardware, bungies, drill bits, organizer)
And my friend Brad Miller at FastSigns for helping me out with the custom vinyl cutting.


